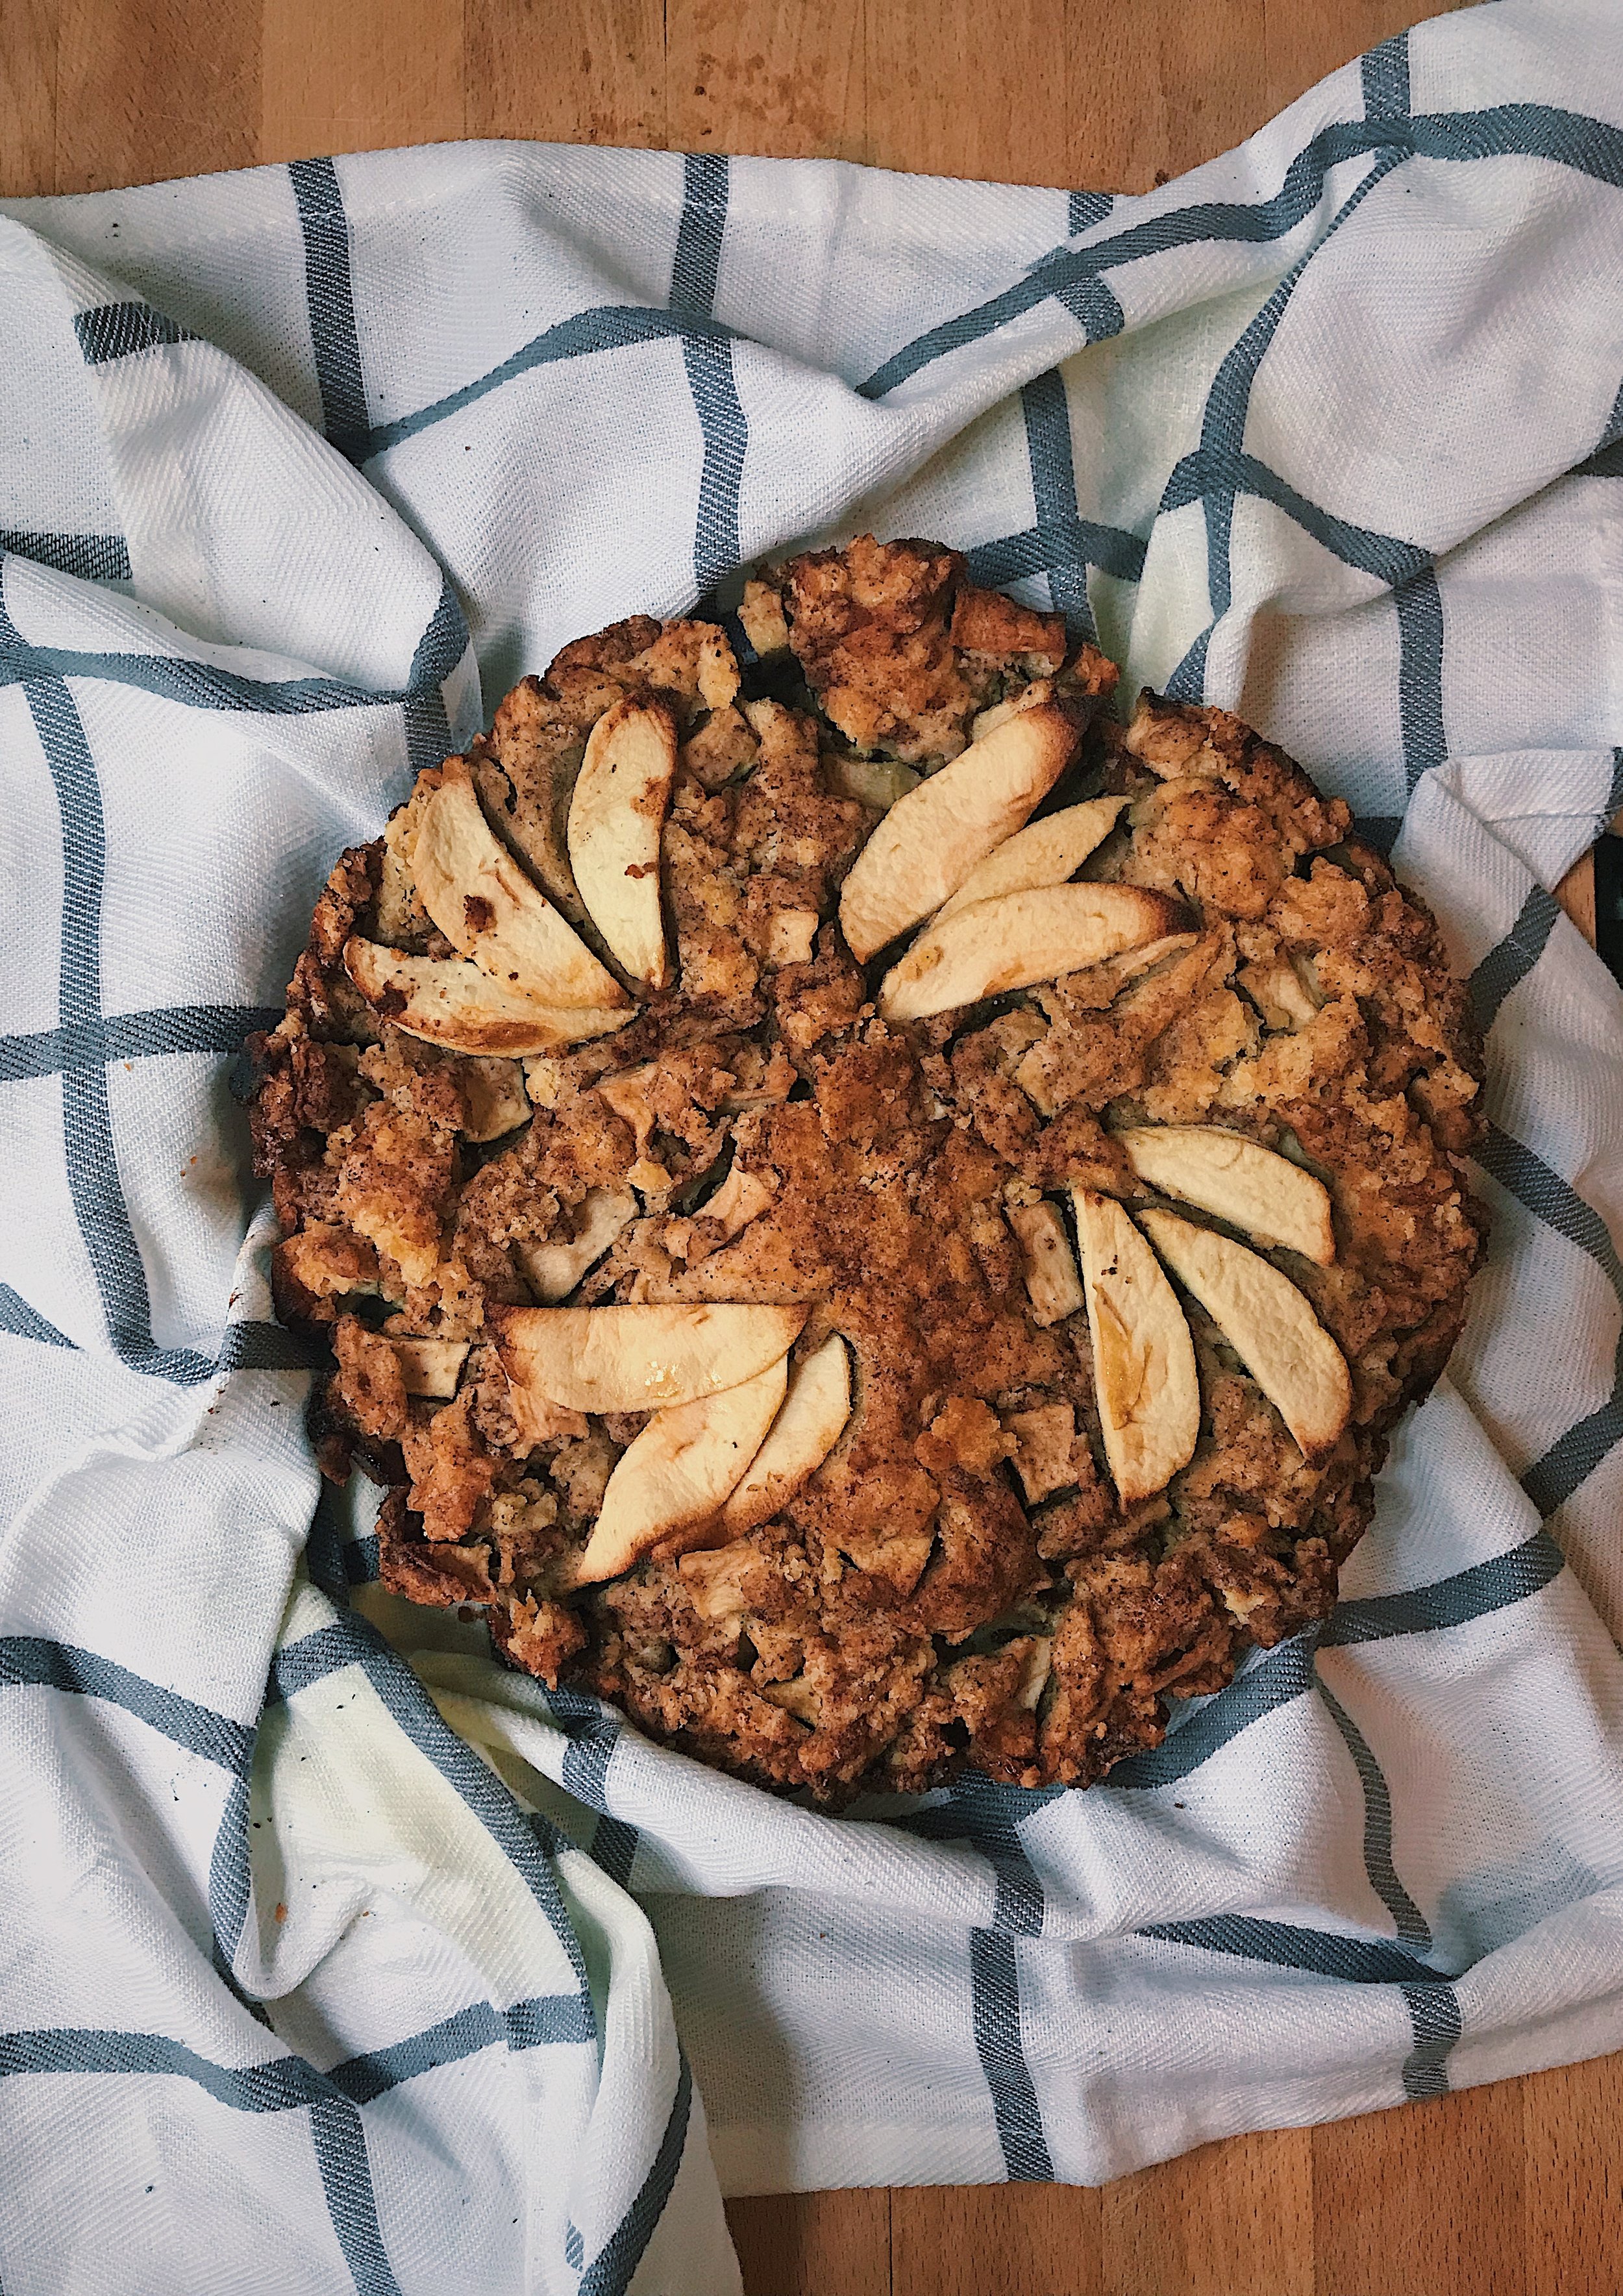
(Even Easier) Easiest Apple Cake

Every fall I get massively overwhelmed by the amount of apple recipes thrown at me from all corners of the food blogging world. Not sure what's wrong with me but all the ways to bake apples, no matter how elaborate, read to me as "spend 2 hours making apple pie". Despite the popular expression, nothing about apple pie is what I would qualify as easy. When I hear the words, I immediately think about crust and filling and blah- I don't feel like spending 2 hours in the kitchen rolling and kneading and stirring... Basically anything apple related is an immediate turn off. That being said, apples do taste insanely delicious when baked. (Breaking news, folks.) All that ooey gooey warm flavor, nothing tastes as cozy and instantly celebrates the season as a warm, baked all the way through apple. This was my dilemma a few weeks ago when I bought ten tooo many apples at the market. There was also a moment of weakness with some cider donuts but, half a dozen for $3?! Cheap! Seasonal! Sale! Surprise, I have no will power when it comes to discounted fruit and seasonal baked goods. 

IMG_5103.JPG
IMG_5104.jpg

In an effort to validate my laziness and make sure that aforementioned apples didn't go rotting away on the counter, I decided to revisit an apple cake recipe I shared last year. I was planning Rosh Hashanah dinner and figured this was the perfect time to test what I had claimed to be “easy”. As with all my recipes the goal is to spend less than 30 min. doing prep work and no more than an hour actually cooking. Minimal effort, maximum flavor. I set a timer and went to work.

After adjusting a few ingredients and cutting down on steps, the result was fast and flavorful. If you're like me and are terrified of baking a cake that involves apples because it all seems as labor intensive as apple pie- this is the cake for you. I highly suggest working this into a menu for a dinner party. I soaked peeled, cut apples in bourbon while I showered, made the batter while my hair dried, and stuck it in the oven while I changed the baby and set the table. By the time my guests arrived the apartment smelled amazing and the cake had time to cool during the main meal.

BB23BF4B-4998-47E8-923B-3E1BD3602E9A.JPG

easiest apple cake

Ingredients

  • 4-5 apples, peeled + chopped into approximately 1 inch pieces. (I used Granny Smith but whatever you have on hand will work. I sliced some of the apples horizontally for decoration.)

  • 3 large eggs

  • 2 cups bourbon (This is optional, the bourbon gives the apples so much flavor but if you don't have any, don't let it stop you from making this. Just mix 1/4 cup sugar with the apples and let them sit to really bring out flavor + juices.)

  • 2 tsp. vanilla extract

  • 1 cup vegetable oil

  • 3 cups flour

  • 1/2 cup sugar

  • 1 tbsp. baking powder

  • 1 tsp. nutmeg

  • 1 tsp. ginger

  • 1 tsp. clove

  • 2 tsp. cinnamon

  • 1/4 cup honey

  • pinch turbinado sugar

IMG_5107.jpg
  1. Preheat oven to 375°F. 

  2. Peel and cut apples into 1 inch pieces, place into a bowl. 

  3. Pour bourbon over the apples and let soak while you assemble the other ingredients or if you’re like me, take a shower.

  4. Make the spice mix: combine cloves, cinnamon, sugar, nutmeg in a cup. Give it a stir. 

  5. Thoroughly whisk all the wet ingredients in a bowl.

  6. In a separate bowl combine dry ingredients.

  7. Fold wet ingredients into dry ingredients, mix well. 

  8. Drain the bourbon from the apples, reserving 1/4 cup.

  9. Pour bourbon into the batter give it a good stir. 

  10. Fold apples into the batter.

  11. I split the batter between two 8 inch round pans - plenty for 2 small cakes. Alternately, you could make one large cake in a 10 x 3 inch pan.

  12. Sprinkle the top with turbinado sugar and a drizzle of honey.

  13. Decorate with apple slices.

  14. Bake cake for 35-40min or until toothpick inserted into center comes out clean. 


IMG_5121.JPG

Almond Meringue Cookies + It's Spring! (sort of?)

Finally, after weeks of the same notification from Alexa, "41 degrees and cloudy with a chance of flurries", today felt like Spring. The last few weeks the days have been so grey it feels like we've been in an endless tug of war with winter. Opening the windows to let in a fresh breeze felt spectacular. Just what I needed to get into gear to finish off my last week of pregnancy on a super positive note.

Growing my very own watermelon!

Growing my very own watermelon!

More so than in previous posts, this year I feel like pressing RESET on everything. No surprise, really. At 38.5 weeks pregnant I am the size of a watermelon and nesting hard. My brain feels like scrambled eggs except when it comes to organizing closets, creating freezer meal plans, and reshuffling the pantry for baby bottle storage. Also, I channeled all of my neuroses and folded every single towel we own into a perfect square. I am told this is entirely normal behavior one week before your entire life changes. 

In an effort to curtail irrational terrorizing of every linen closet and resorting of paper towels and pillowcases (for the third time in two weeks), I spent this week letting all my anxious energy out through transforming the apartment for warmer weather. 

Over the last few days I arranged fresh flowers and put away everything that reminds me of winter: no more boots and no more puffy marshmallow pregnancy coat! Referencing seasonal posts from years past really helped me figure out what to tackle and stay motivated. In no particular order and with as much energy as my very round self could muster, I attacked each of the below. Hope this burst of warmth is as motivating to you as it was to me. Each post is linked so click away!

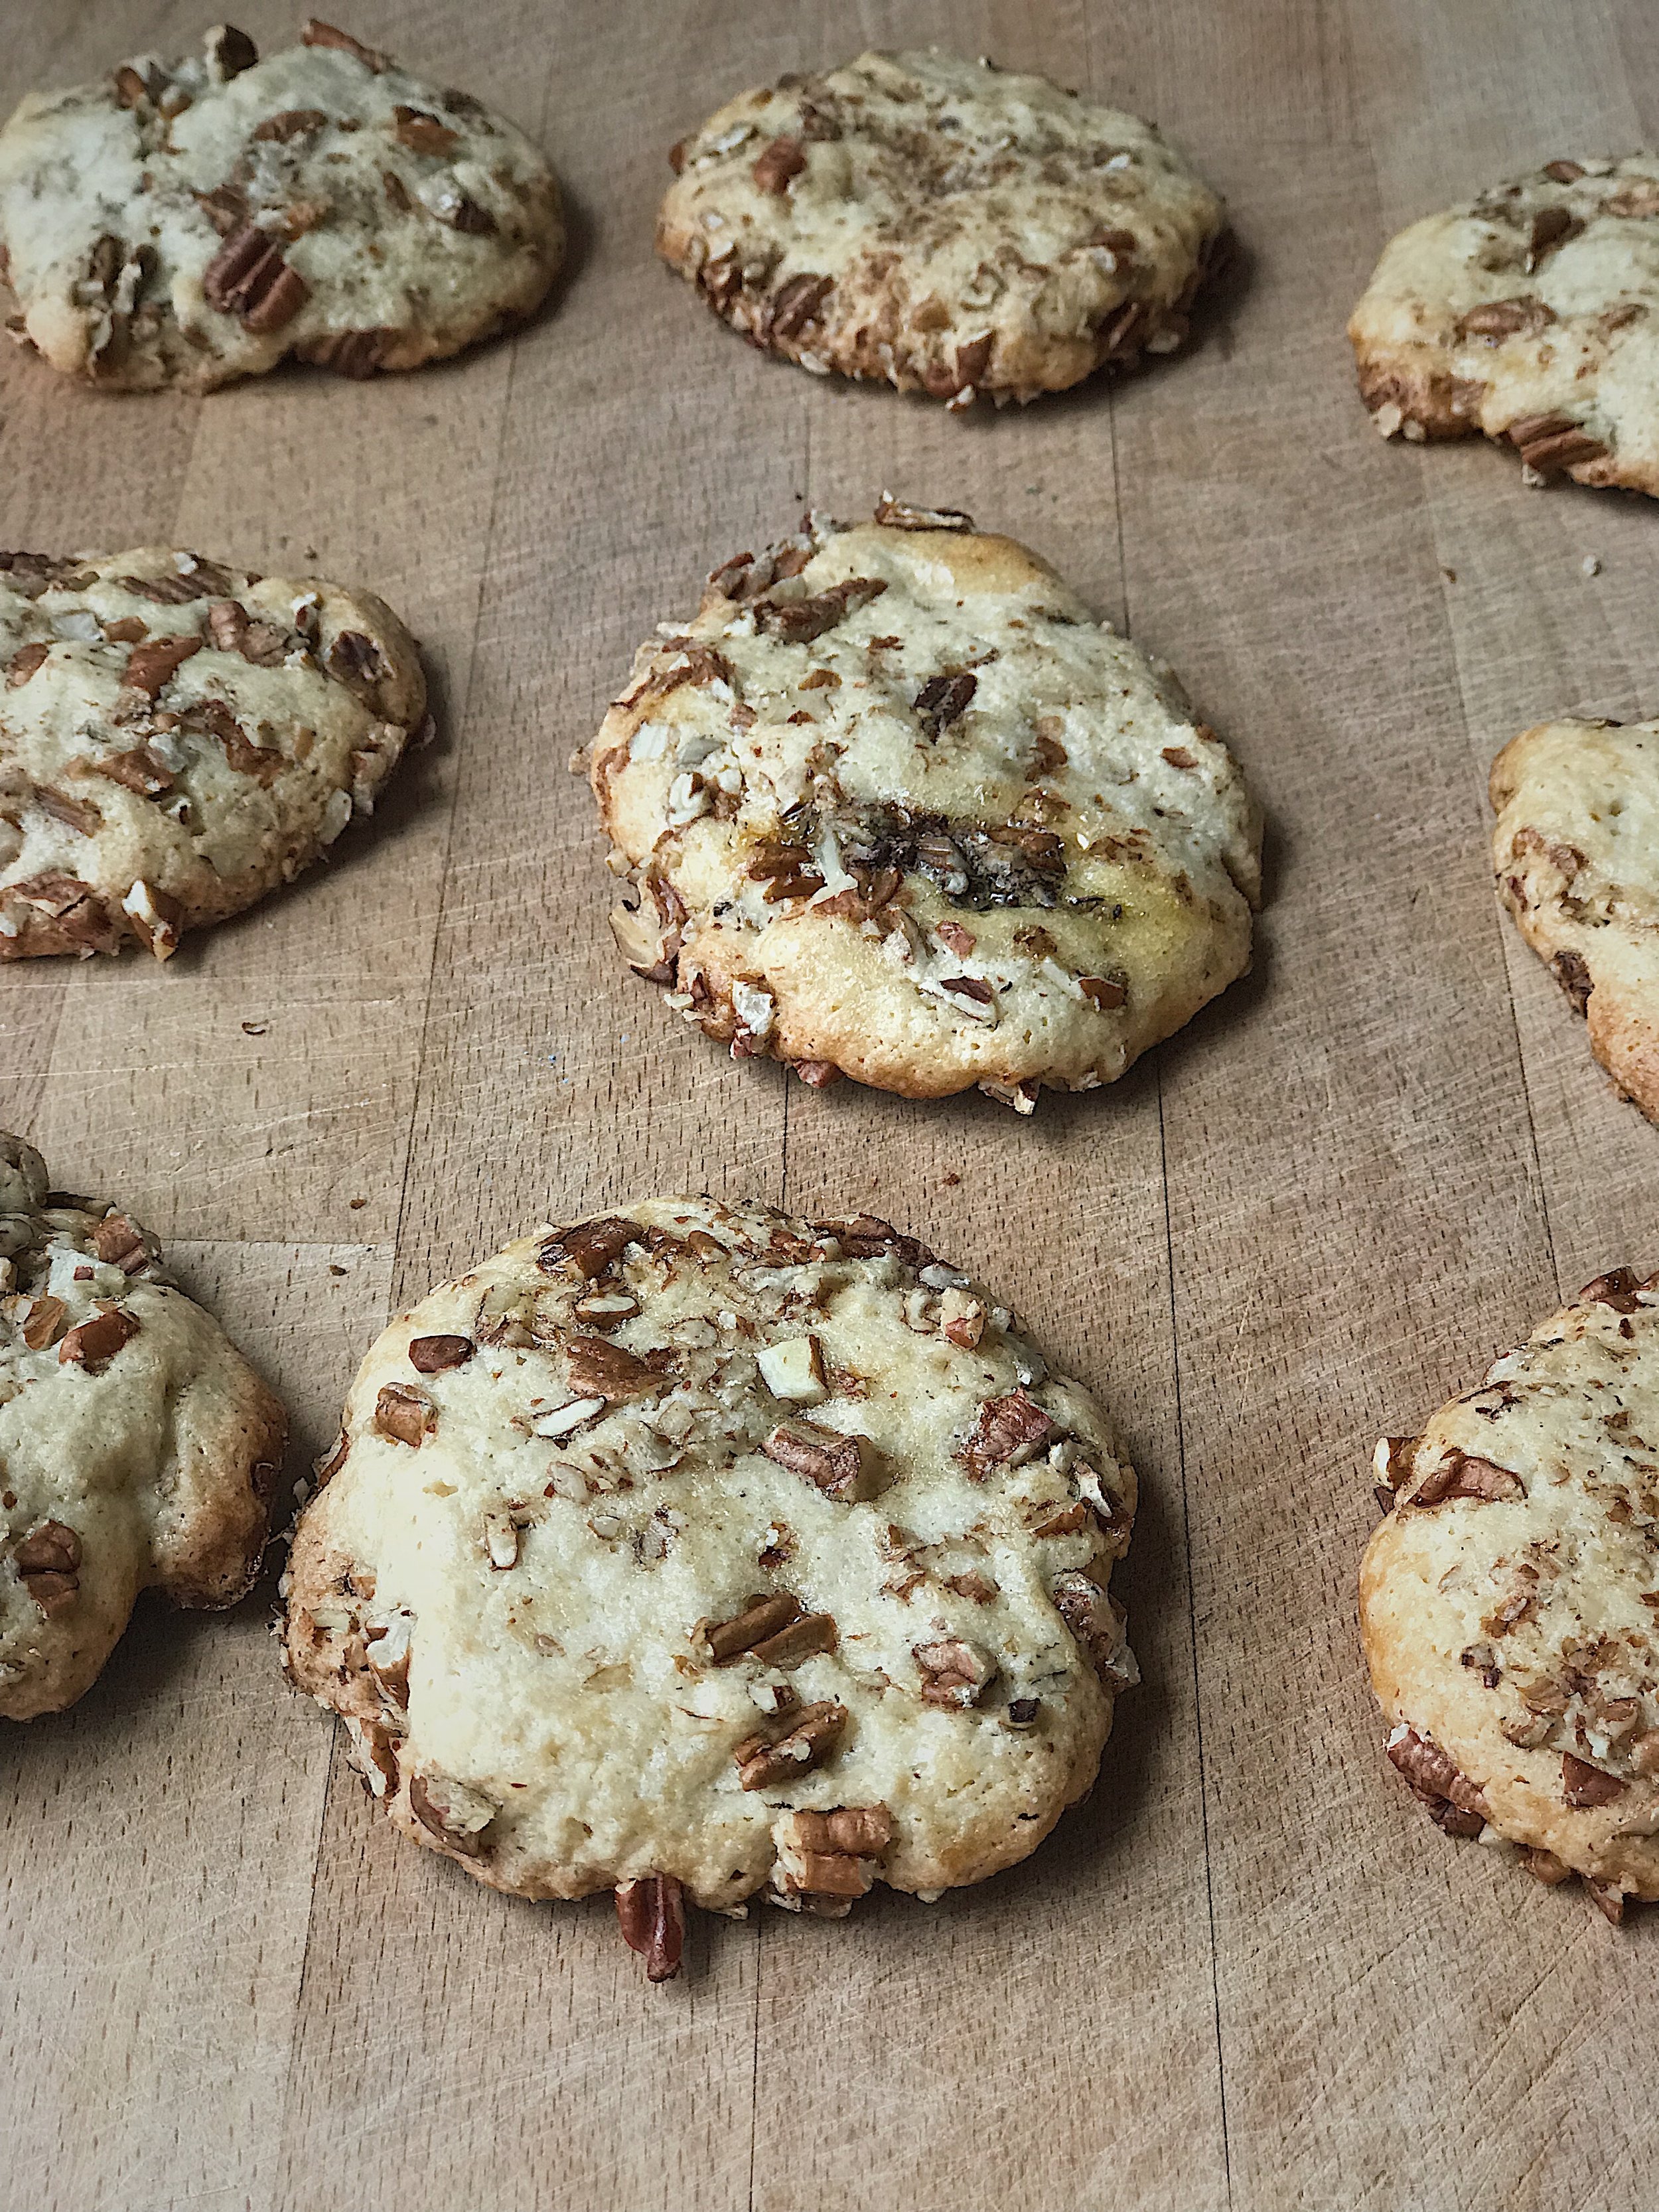
Then, once my home was relatively in order - I baked the best cookies of my entire life. For the record, cookies have never been my forte and they've never been my favorite. I'm mostly a chocolate chip girl and only on very rare occasions (somehow, cookies never satisfy a craving for me the way ice cream or brownies do.) That completely changed when I made these. I've made them twice since Passover (they're gluten/flour/leavening free) and vowed to never let my cookie jar be empty again.

Not too sweet, not too crunchy, not too soft. If I am the Goldilocks of cookies I finally found my perfect fit. Ok, I'm awful at analogies but these are SO good. Please forgive me, and make them this weekend! 

629FEE11-5CA0-4255-966A-33F948AF269D.jpg

Almond Meringue Cookies

Ingredients

  • 3 cups almond flour
  • 4 egg whites room temperature. reserve one for later in a separate cup. 
  • 1/3 cup buttermilk or whole milk
  • 1 cup sugar
  • 1 tsp. vanilla
  • pinch of salt
  • rough chopped almonds, pecans, or walnuts
Meringue before I folded it into the dry ingredients. It will deflate as you incorporate it into the mixture.

Meringue before I folded it into the dry ingredients. It will deflate as you incorporate it into the mixture.

  1. Preheat over to 300F. 
  2. Beat 3 egg whites and the pinch of salt in a bowl with an electric mixer until stiff peaks form. The trick to egg whites is that all of your equipment must be totally dry. Not a single drop of water anywhere! Like the desert but even less. (Thanks, mom for this tip! Only took me 2-3 years to ask why I couldn't manage "stiff peaks".)
  3. Combine all dry ingredients. 
  4. Gently fold the meringue into dry ingredients.
  5. Add buttermilk and vanilla.
  6. Stir to combine into dough. It will be very, very sticky.
  7. Chill in the refrigerator for 15 minutes. 
  8. While the dough is chilling chop up your toppings and remember the egg white you set aside in a separate bowl. I used pecans but honestly any nut or even chocolate chips would work.
  9. Scoop up slightly smaller than golf ball chunks of dough, roll into a ball.
  10. Coat cookie dough ball in egg white followed by topping of choice. Flatten into patty... or cookie. Cookies are a type of patty, right? Whoa.
  11. Place on greased baking sheet or parchment paper.
  12. Bake cookies for 15- 20 min, until edges are a bit brown. Cool and then eat. Duh!


IMG_E3235.jpg
IMG_3238.jpg
IMG_3237.jpg


Chocolate Banana (N)Ice Cream

Since I've jumped on the eat clean food wagon a few months ago, I've learned two things:

  1. I have a lot less will power than I thought. I kept Whole30 for a week and then broke it for a glass of wine. (No regrets. It was worth it.)
  2. I want to change my approach to food + cooking, as a whole. Sugar and processed foods as a treat, not a cornerstone of my daily diet. 

Truly the greatest shift of the last few weeks hasn't been whether or not I can stick to a diet but rather the attention I pay to the kind of food I eat. I knew that most of what we were cooking and eating had additives and so much sugar, but since I've made it a practice to notice, the amount is frightening. Switching to primarily whole foods has not just been healthier, it's been more flavorful. I've been so pleasantly surprised by how fun cooking has been! (I originally wrote "easy and fun" but that's a lie. This is not easy, ordering pizza and Indian is easy.) Cutting out processed foods and substitutes has made me experiment and look up more new recipes than I have in months. Oh, and my jeans fit better.

frozen muscadine grapes in place of candy or chips as a snack.

frozen muscadine grapes in place of candy or chips as a snack.

whole ingredient dinner.

whole ingredient dinner.

Unfortunately, it's not all roses and saturated fat free brownies over here. There's one thing that I've tried to go without the last few weeks that has been difficult to forego. Ice cream is my downfall. One problem, I don't handle dairy very well so ice cream has been relegated to the "once in a while with an acid reducer pill" category. There's also that whole fitting into jeans thing, remember?

Hence the discovery of Chocolate Banana (N)Ice Cream. 

IMG_1256.jpg

For weeks I've been heading to the grocery looking for ice cream substitutes because to me Summer = Ice Cream. I've tried everything on the market and here's the problem - none of it is that good. I'm sorry vegans, but that stuff doesn't cut it.  Also, the imitation ice cream is expensive! $6.99 for less than a pint adds up quickly. There's also added sugar, weird ingredients I don't know, etc. To satisfy my craving and save money I've been making my own creamy, cold, slightly sweet treat to have after dinner on a warm summer eve. Maybe topped with a few berries and a drizzle of honey, maybe with a spoonful of crème fraîche. Just a little something. Give it a whirl? It's not ice cream, it's for sure not frozen yogurt, it's just... (n)ice.


Chocolate Coconut (N)Ice Cream

7C2F0858-BAE7-4EE8-A53D-833CD8B9689A.jpg
  • 3 bananas, sliced.
  • 1 can coconut milk
  • 1/3 cup cocoa powder
  • 1 cup unsweetened coconut flakes
  • 1/2 cup almond butter
  • 1/4 cup cold espresso or coffee
  1. Freeze bananas for an hour.
  2. Blend all ingredients in a food processor until smooth.
  3. Eat immediately with toppings of your choice.
  4. Freeze leftovers for up to two weeks. Frozen dessert will be hard to scoop so before eating let it sit on the counter for a little bit. Most ice creams have preservatives and additives that make them easy to scoop once frozen, natural versions do not.
Topped with Coconut flakes and roasted almonds.

Topped with Coconut flakes and roasted almonds.

IMG_1261.jpg